The fighting stance that we use is a great crossover stance that will serve you well in MMA. We use the basic foot position used in wrestling, boxing and Muay Thai which are the essential parts of the standup game in MMA.
The trick with adapting it to Mixed Martial Arts is to be quick and versatile with the level changes and to train counter techniques for the transition between toe-to-toe and inside grappling as well as take downs and the defense of take downs. For example; a traditional Muay Thai stance is very upright and the advantage it lends is the speed at which a person can throw a kick from there or check and counter. The problem is that, with so much weight on the back foot, it is hard to keep good balance when the opponent is driving forward as a wrestler would. In this case, a fighter who is very confident with his ground game might be ok with this because he knows he can take a toll on his opponent with kicks and if he gets taken down he will survive. An example of this type of fighter would be Donald Cerrone. Most of the time he can get the better of his opponents with his fantastic stand-up and if someone does shoot in and take him to the floor Cerrone would make his life suck badly! Where this is not good for him is when dealing with a boxer like Nate Diaz.
The lower stance, the crisp boxing head movement and the angles tore down Donald's very upright stance and defense.
Another aspect that is coming in to play in the last few years is the fact that Dana and many other promoters are paying bonuses for fight of the night and the careers of the fighters depends so much on making exciting fights and the brawling stand-up battles are becoming more common. No matter what you can do on the ground, the stand-up game is in play!
Tuesday, January 31, 2012
Tuesday, January 24, 2012
How to do a Boxing left hook or #3 punch

The left hook is a power punch based more on torque than pure horse power. What I mean is, the power for this punch comes from the turn of the body, the shifting weight and the pull from the head moving from one side to the other. There is no arm power needed to knock someone out with a hook! Keeping your punches and combinations tight and clean, leaving no openings for your opponent to sneak in will give you more success and less damage. As for the fist itself, You have a couple options. There are some fighters who prefer to hold the fist palm down but I was taught to hold it "hammer style". The idea being that you are trying to catch the tip of his chin with your fist to get the leverage to crank the button. As with all punches, the more you throw your head into the motion, the more power you will generate and at the same time, you give him a moving target.
The basic elements of the punch are:
1. Plant the back foot in the fighting stance. (do not let it turn whatsoever)
2. Shift the weight towards the back foot.
3. Turn the front foot on it's ball.
4. let the turn move through the entire body.
5. At the last second, bring the hand away from the face and the arm in a "hook" shape or at a right angle, while the shoulder replaces it to cover your chin.
6. Bring it back to the face, returning to your stance.
Thursday, January 19, 2012
How To Throw A Boxing / Kiockboxing Right Cross
We continue with the primer on the basic punches. Today we talk about the #2 punch or "Right Cross".
This punch is statistically the best knock out technique because of the leverage, reach and accuracy. You could probably get more raw torque with a hook or over hand but if your opponent's hands are up you will most likely hit an arm or glove wear as, the two punch lines straight and is designed to connect to the button.
The main points for throwing a good right hand are:
1. Push and turn off the back foot until the leg is straight and the heel is pointing outward.
2. Translate that turn through the entire body until the right shoulder is pointed at your opponent's chin, the left shoulder is completely turned the other way.
3. At the last second, the hand leaves the face, pushing straight from the cheek to connect to the opponent's chin. The right shoulder replaces the hand to protect the chin.
4. Get the hand back to the face as quick as possible.
Tuesday, January 17, 2012
How To Throw A Jab
The best way to describe how to throw a powerful jab is to compare it to whipping a towel or bull-whip. If you can imagine the soft piece of cotton slowly slinking along in no big hurry, then suddenly, at the last split second, the tiny end of the towel changes direction. The violence at the end of that motion is all too well known by many a football player and boarding school alumnist!
Trying to throw any punch by simply using arm power will not get you the results you want but it will tire you out very quickly. Imagine floating in space and swinging a punch; The force pushing you backwards would be as much as the punch itself because you have nothing to anchor your power to, nothing to push off. We, on the other hand have the whole earth to push off, so use it!
Any time I demonstrate a punch in the gym I start with the feet. You should either be pushing, turning or a combination of the two. At least one of your feet should always be planted in the fighting stance to give you something to anchor to. If you let both feet turn, you will not be balanced when you fire out more than one punch. I see so many big guys beating the crap out of the punching bags with no proper foot positioning. When you are fighting in the ring, it is be much different because there are so many dynamic forces at work; pushing, pulling getting hit, hitting him or missing a punch, take down attempts etc. Having one foot always strongly based on the ground is necessary as you can see.
Allt that being sai, here are the basic fundamentals of the jab:
1. Push off the back foot.
2. rock the head forward and up as though you were trying to head-but your opponent.
3. at the last second, the hand snaps , from the face strait out and slightly uppward.
4. The shoulder replaces the hand to protect the chin.
5. snap the hand back to the face.
The next posts I will show the rest of the punches as well as a great way to put them together with balance, speed and power.
Monday, January 16, 2012
"The Magic Pill" short story
With the smell of incense and stale gym bags, another brutal training session ends with the familiar gruff Asian voice saying "Ok, let's have a seat and talk about yack about." The hard, worn out, blood red industrial carpet not the most comfortable seat but still a welcome break from the grind as we sat cross-legged on the floor. The Richmond Kung Fu and Muay Thai school was packed with about 40 guys and girls with boxing gloves slung over the necks, shirts and shorts, soaked in sweat. Sifu Hon Lee, cousin of Bruce Lee and generally bad-ass old Chinese man, occasionally had these sessions where we would talk about "street smarts" - his version of self defense. He would often encourage people to chime in with their questions and that there were NO stupid questions. (Picture a rated "R" version of Mr. Miyagi.)
During the discussion, a student who was pretty new to the class asks a question that earned gasps and muffled snickers from the veteran students. I'll skip the question but here is the reply that all the older students knew was coming next:
"Ok, I tell you what, go down to London Drugs and walk all the way to the right side of the store. Go strait to the back and on the second shelf, right beside the vitamin C you will find a special vitamin call 'How to stop a guy try to choke me'." Of course, the whole class starts to laugh at the kids stupid question and Hon continues. "You see, my point is that you don't even know how to do a jab and you want me to tell you how to defend against somebody choking you?! It doesn't make sense!"
The moral of this tale is:
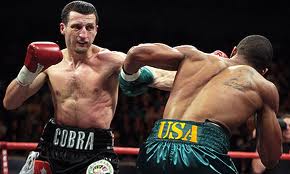
You must put in the time with the basics! Being tight with your basic BJJ positions and having strong take downs and take down defense are a must! The stuff I talk about being on autopilot, footwork, head movement and jab have to be mastered before moving on. I see fighters who have quite a few fights under their belts and are still shaky on these things. When you get to a higher level of fight competition, you better believe that they will have their shit together with these basics! So before you move on, thinking that you are the protege everyone has been waiting for, drill the crap out of your basics. Keep those hands up - you aint no Carl Froch or Roy Jones jr. yet and you aint that fast!
Stay tuned for some upcoming video on basics and drills to build skills!
Tuesday, January 10, 2012
Head Movement Part #1
In the last few years, as MMA continues to evolve, we see more and more use of boxing technique in the cage. The obvious would be the punches and combinations but we are also starting to see some good footwork and head movement. At Carlson Gracie MMA in Maple Ridge we study boxing and Muay Thai / kickboxing separately, put it together, then blend it with our wrestling to get the best positioning for take downs and defense. A large part of boxing is in the defense which includes head movement and foot work. These basics should be in what I call "Auto-pilot". The way we train our fighters is to have these things along with the jab working constantly to keep the opponent busy while we strategize and look for openings and weaknesses from the corner. I expect my fighters to be busy from the start with non-stop movement, so I can concentrate on calling out punches, kicks, combinations or shots. I don't want to be telling them to do these basic things. A fighter should never be standing in front of his or her opponent waiting, unless it is part of a strategy to suck them into a counter.
The three components of "Auto-pilot" are :
1. Footwork
2. Head movement
3. Jab
If a fighter does not have these 3 things absolutely mastered, they are not ready for the ring.
For this series of posts I will concentrate on head movement and it's key components and uses.
Head movement does 3 important things.
1. Defense - It makes you a moving target; Add head movement to your combination and any time you are not punching or kicking you should be moving your head or moving your body.
2. Adds power to your punch or kick by hiding your windup in your defense.
3. Adds momentum to your lateral movement.
4. Can be used as a set up or fake by making him flinch.
(We don't fake with punches, either throw em or don't!)
Check out Couture vs. Sylvia to see a great wrestler who learned how to employ the use of head movement to get past a larger opponents long reach.
Monday, January 2, 2012
New years workout
I'm doing a couple short blog posts on getting back into shape after the holidays. I say they will be short because there won't be much bullshitin' as you know, I like hearing myself talk but for today let's get right to the workout.
{Remember that you should always check with a medical professional before starting an exercise program. This workout is pretty hard and the people I am training have been doing this for a while so you might need to work your way up to this intensity.}
The next couple weeks we are trying to get back into the swing of things so we went a little easy on the workouts. The first day we did aerobics mixed with some plyometric intervals of one minute followed by a small circuit of weights. It went like this:
First we did a slow warm up and then 10 minutes of medium impact aerobics; ie. Jumping jacks and twists etc. Once well warmed up we did some plyometric interval sets, going from a high intensity sport-specific movement to a more plyometric movement. These you can mix up any way you like for your sport.
Do each set 3 times.
Set 1. Straight punches for 1 minute then hit the floor for wrestling hip heist 10 times.
Set 2. Punch, knee punch knee alternate sides for one minute then hit the floor for 10 clap pushups
Set 3. Left and right upper-cuts fast for one minute then hit the floor for sprawl to knee alternate sides.
Then we switched to full body weighted movements
1. Squat press - 20 reps
2. "Raise the dead" (stiff leg deadlift to a front row) - 20 reps
3. Curl to press - 20 reps
Then we did another round of aerobics with plyo intervals.
Try this out yourself this week and I'll shoot you some more later.
/view_video.php?viewkey=1
The next 2 workouts will be based on Tabata intervals.
A Tabata interval consists of the maximum reps or intensity you can do for 20 seconds of work and 10 seconds rest. Do up to 7 of these interval sets for each exercise.
Subscribe to:
Posts (Atom)